Four Numbers to Measure for Clothes Before You Buy
Grab a soft tailor’s tape right now and measure four things: chest or bust, natural waist, full hip, and inseam. Those four numbers solve most online fit problems on their own. Measure over light clothing, do each one twice, and average the results if they don’t match exactly.
Chest/bust: around the fullest point, tape level
Natural waist: the narrowest point when you bend sideways
Full hip: the widest point around your seat
Inseam: only needed if you’re buying pants
The whole process takes about five minutes. Once you have these numbers, every size chart on every website becomes readable instead of a guessing game.
Key Takeaways
Getting the right size online comes down to four accurate body measurements, matched to the specific brand’s own chart rather than a generic label.
Point Details Measure four core numbers Chest/bust, natural waist, full hip, and inseam cover most online purchases. Use a new soft tape Old tape measures stretch and can throw readings off by a small amount. Measure twice, average results A single pass can be off by half an inch from posture alone. Match numbers to the brand’s chart Size labels vary by brand; your measurements stay constant across all of them. Consider ClothME for repeat shopping A two-photo profile replaces manual re-measuring across brands and family members.
Table of Contents
Tools and Prep for Measuring for Clothes Accurately
You need four things: a new soft tailor’s tape (an old one stretches and throws off readings by an inch or two), a full length mirror or a helper with a phone camera, a thin elastic band or ribbon, and something to record numbers on immediately.
Put on light underwear or the fitted layer you’d actually wear under the garment, including the bra or shoes if they change your shape.
Tie the elastic around your natural waist and let it settle where you bend sideways. That’s your true waistline.
Stand naturally, don’t suck in, and measure in front of a mirror or with a second pair of hands.
Measure in the afternoon rather than first thing in the morning, when slight bloating from the day gives more consistent numbers.
Take every measurement twice before writing anything down.
Pro Tip: Keep one finger flat under the tape as you pull it snug. That’s the difference between a measurement that matches your body and one that’s been squeezed a half inch too tight.
How Do You Measure Your Chest, Waist, Hips, and Inseam?
These four numbers are the backbone of nearly every clothing size chart on the internet, and getting them right is worth the extra sixty seconds it takes to double check.
Chest or bust. Wrap the tape around the fullest part of your chest, keeping it level front and back, not angled up or down. Arms stay relaxed at your sides. If you’re shopping for a structured jacket or a fitted button down, also take a high bust measurement just under your armpits and above the bust point. Some tailored garments key off that number instead.
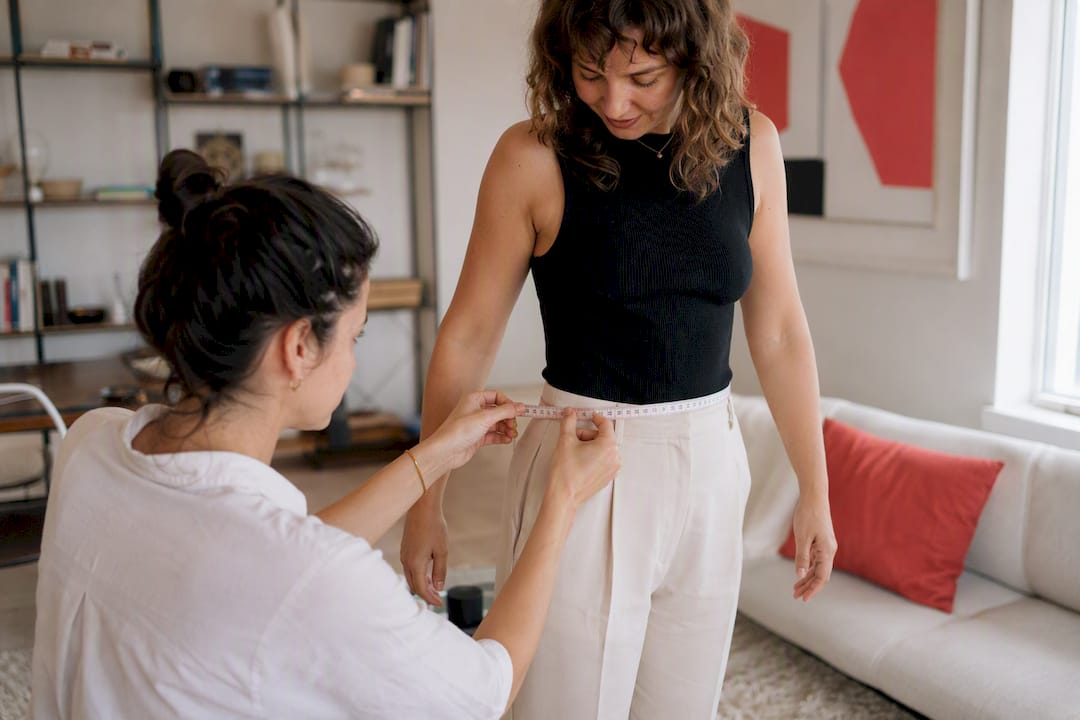
Natural waist. This is where the elastic you tied earlier comes in. Bend to one side and find where your torso creases naturally. Wrap the tape there, keeping it parallel to the floor, and leave enough slack for one finger to slide underneath. Most people measure their waist an inch or two higher than it actually sits, right around the belly button, which throws off pants sizing more than almost any other mistake.
Full hip. Stand with your feet together and wrap the tape around the widest part of your hips and seat, usually seven to nine inches below your natural waist depending on your height. Keep the tape level all the way around, not just in front.
Inseam. The easiest way to get an accurate inseam isn’t to measure your own leg while standing (you’ll almost always come up short by an inch or more). Instead, lay a pair of pants that already fits well flat on a table and measure from the crotch seam straight down to the hem. If you don’t own a good-fitting pair, have a helper measure from your crotch to the floor while you stand barefoot in your normal posture.
For most shoppers, these four numbers, chest, waist, hips, and inseam, cover the overwhelming majority of what any size chart asks for. If you’re only buying tops, you can skip the inseam entirely and stick to three.
Record every measurement in both inches and centimeters. American brands typically list inches, European brands list centimeters, and having both saves you from doing math mid-checkout. And always measure twice and average any measurement that comes out different the second time. A quarter-inch discrepancy is normal; a full inch means you need a third pass.
What Other Measurements Matter for Tailoring?
Structured garments, tailored trousers, and made-to-measure pieces ask for more detail than a basic size chart. You won’t need these for a t-shirt, but you will for a blazer.
Shoulder width: Find the bony point where your shoulder meets your arm on each side, then measure straight across your back between the two points. This one is nearly impossible to get right alone. Have a helper measure your shoulders while you stand relaxed with arms at your sides.
Sleeve length: Bend your elbow slightly and measure from the shoulder point down to your wrist bone. Bending the elbow matters. A straight-arm measurement runs short once you actually move your arm.
Neck circumference: Wrap the tape around the base of your neck where a collar would sit, leaving room for one finger. This is the number that makes or breaks a dress shirt.
Thigh and calf: Measure around the fullest part of each for fitted or tailored pants.
Back waist length: From the bony point at the base of your neck straight down to your natural waist, useful for dresses and fitted jackets.
Take these when a brand’s size chart specifically asks for them, when you’re ordering anything made-to-measure, or when a garment is structured enough that an inch of error actually shows.
How to Measure Clothes You Already Own
Sometimes the fastest way to check a fit isn’t measuring your body again, it’s measuring a garment you already trust.
Lay the item flat on a bed or table and smooth out every wrinkle before you touch the tape.
For chest sizing, measure straight across from armpit to armpit (pit to pit) and double that number to get the full circumference.
Measure from the shoulder seam down to the hem for overall length, and across the waist while laid flat (doubled) for pants and skirts.
For pants, run the tape along the inseam from the crotch seam to the hem.
These are garment measurements, not body measurements, and the two are never identical. Designers build in ease, extra room baked into the pattern so the fabric doesn’t sit skin-tight, which is exactly why a garment measurement differs from your body measurement. A shirt with a 40-inch flat chest measurement (80 inches around) fits a 38 inch chest comfortably because of that built-in ease. If your favorite oversized sweater measures four inches bigger than your actual chest, that’s your benchmark for how much ease you personally like in a relaxed fit.
How to Match Your Measurements to a Size Chart
Your body measurements stay constant. Size labels don’t. A medium at one brand can fit like a small at another, which is exactly why matching your numbers to the brand’s own chart beats trusting whatever letter or number is printed on the tag.
Open the specific product’s size chart, not a generic brand-wide chart, since fits vary by style within the same label.
Identify which single measurement controls fit for that garment: chest for a top, waist and hip together for a dress, waist and inseam for pants.
Read the fit notes on the product page. “Runs small” or “relaxed fit” changes which size you should pick even when your numbers land dead center on a size chart.
Check reviews for mentions of true-to-size, and note the reviewer’s height and measurements if listed.
When you’re stuck between two sizes, fabric content decides it. A woven, non-stretch fabric like structured cotton or denim should push you toward sizing up for comfort. A knit with meaningful elastane content usually lets you size down or stay put, since the fabric will move with you.
Pro Tip: Screenshot the size chart before you check out. Returns take longer than a five second photo, and you’ll want that chart on hand if the item needs an exchange.
Converting Sizes Between US, UK, and EU Systems
Sizing systems don’t share a common scale, and the gap is bigger than most shoppers expect. A US women’s size 8 typically corresponds to a UK size 12 and an EU size 40, roughly speaking, but the exact conversion depends on the garment category and even the individual brand’s cut.
The safest method skips conversion charts entirely: use your actual body measurements in inches or centimeters and match them against the specific product’s size chart, which almost always lists the equivalent numbers for each region it sells in. A European brand selling in the US will usually list both EU and US sizes with the corresponding chest, waist, and hip ranges for each.
If a brand only lists one region’s sizing and you’re shopping from outside it, general rules of thumb help as a starting point:
Women’s tops/dresses: US size + 4 roughly equals UK size; US size + 32 roughly equals EU size.
Men’s shirts: Neck measurement in inches is often the same across US and UK systems; EU sizing typically converts to a two-digit number tied to chest circumference in centimeters.
Shoes: These vary the most by brand and category, so always check the brand’s specific shoe conversion rather than a general chart.
Treat every conversion formula as an estimate, not a guarantee. Two brands both claiming “EU 40” can differ by a full inch in the chest. Your measurements in inches and centimeters are the one constant that travels across every system without losing accuracy.
How Does Body Shape Change What You Should Measure?
Two people can share an identical waist measurement and need completely different sizes, because the relationship between waist, hip, and bust varies by body shape, not just by scale.
If your hip measurement runs several inches larger than your bust, a size chosen purely on bust measurement will gap at the waist and pull across the hip. The reverse applies to broader shoulders and chest relative to waist and hip; sizing to the waist alone leaves the top too snug. This is exactly why brands that only publish one measurement per size, instead of a full chest, waist, and hip breakdown, are harder to shop from accurately.
Practical adjustments by shape:
Larger hip relative to waist and bust: Size to your hip measurement for dresses and fitted bottoms, then check the brand’s fit notes for stretch or an A-line cut that accommodates the difference.
Broader shoulders and chest relative to waist: Size to chest for tops and jackets, and expect to need waist tailoring for a fully fitted silhouette.
Similar bust, waist, and hip measurements: You have the most flexibility across cuts, and straight or column silhouettes tend to fit closest to the size chart’s expectations.
None of this means your shape is a problem to solve. It means the single most useful thing you can do is record all three core measurements, not just one, so you can spot which one is the deciding factor for any given garment before you buy it.
Common Measuring Mistakes That Wreck Your Sizing
Most bad online orders trace back to one of a handful of repeatable errors, and nearly all of them are fixable in under a minute.
Measuring over bulky clothing. A sweater or jeans under the tape adds a false inch or two to every number. Measure over light underwear or a fitted layer only.
Holding the tape too tight or too loose. Too tight and you’ll order a size too small; too loose and everything runs big. The one-finger-gap rule solves this every time.
Letting the tape sag or tilt. A tape that dips lower in the back than the front gives a smaller reading than your actual measurement. Check in a mirror or have a helper confirm it’s level all the way around.
Measuring once and trusting it. A single pass can be off by half an inch simply from posture or how you’re standing that moment. Measuring twice and averaging catches this.
Guessing your waist location. Most people measure an inch or two higher than their actual natural waist, right around the navel instead of the true narrowest point. The elastic-band trick from earlier fixes this permanently.
Trusting the size label over your own numbers. A large at one brand can measure identically to a medium at another. The tag is a suggestion; your measurements against that brand’s specific chart are the answer.
How to Measure Yourself for Dresses, Jackets, Pants, and Shirts
Different garment types weight different measurements more heavily, so knowing which number matters most for each category saves you from over-measuring and still missing the one that counts.
Dresses. Bust, waist, and hip all matter, and the brand’s chart will usually flag which one is the deciding factor for that specific cut. A fitted sheath dress lives or dies on waist and hip; a flowy A-line cares mostly about bust and shoulder fit.
Jackets and blazers. Chest and shoulder width lead here, with sleeve length close behind. A jacket that fits the chest but has shoulders too wide will never look right no matter how the rest is tailored.
Pants. Waist and inseam control fit almost entirely, with hip and thigh mattering more for fitted or tailored styles. Always check whether the brand measures inseam on a straight leg or a curved one, since that changes the number by up to an inch.
Shirts. Neck and chest lead for dress shirts, sleeve length close behind. Casual button-downs and tees care most about chest and length, since there’s more built-in ease to forgive minor differences.
If you’re ordering anything custom-made or made-to-order, take the fuller set: chest, waist, hip, shoulder, sleeve, and neck. A custom garment guide will typically ask for all of these upfront since there’s no standard size chart to fall back on.
What Most Sizing Advice Gets Wrong
The conventional wisdom treats measuring for clothes like a full-body cataloging project, twelve or fifteen numbers before you’re allowed to shop. That’s overkill for the vast majority of purchases and it’s exactly why people give up and just guess their usual size instead.
The real skill is knowing which three or four numbers actually control fit for whatever you’re buying, and getting those right rather than collecting a spreadsheet you’ll never reference again. Chest, waist, and hip solve dresses and tops. Add inseam and you’ve covered pants. Everything else, shoulder width, sleeve length, neck, back waist length, only earns its place when you’re tailoring something structured or ordering made-to-measure.
Where I’d push back hardest on standard advice: most guides treat “measure once” as acceptable when it isn’t. A single pass is noisy. Posture shifts, tape tension varies, and a half-inch error on your waist is enough to bump you into the wrong size at a brand with tight sizing intervals. Measuring twice and averaging isn’t excessive caution, it’s the one step that actually separates a reliable number from a guess.
If there’s one habit worth building beyond the tape measure itself, it’s keeping those numbers somewhere you’ll actually find them again next time you shop.
— admin
Skip the Tape Next Time With ClothME
ClothME gets you to the same reliable numbers the tape measure produces, without doing the math yourself every time you shop a new brand. Upload two photos, and the platform builds a size profile that translates your actual body shape into recommendations across the specific brands and boutiques you’re browsing, instead of leaving you to reread a chart every checkout.
Where this earns its keep is repeat shopping and family orders. If you’re buying for kids who outgrow sizes every few months, or juggling a partner’s measurements alongside your own, saved profiles for multiple family members mean nobody re-measures from scratch each time someone needs a new jacket. The two-photo setup takes less time than measuring chest, waist, hip, and inseam by hand, and it stays accurate across brands with wildly different size charts. Set up your profile at Clothme and see your first set of matched recommendations before your next order.