Plus Size Fit: Measure First to Find Clothes That Flatter
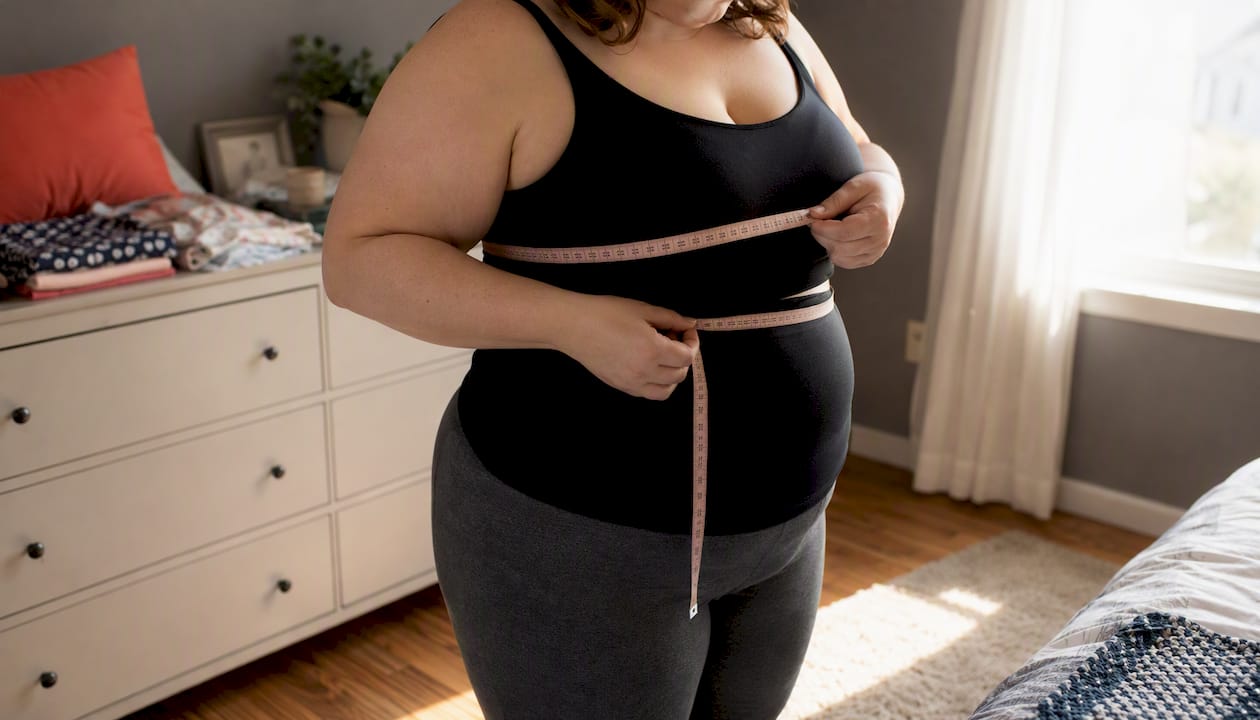
Plus size fit means matching your actual body measurements, not a size label, to a garment’s flat measurements before you buy. The single next move: grab a tape measure and record your bust, natural waist, fullest hips or seat, upper arm circumference, and torso length. These personal measurements help remove guesswork from online size charts.
The payoff shows up fast. You stop buying two sizes “just in case,” and you stop sending half your order back.
Fewer returns because you’re matching your measurements rather than relying on inconsistent size labels
Faster shopping since you can compare your measurements against any brand’s chart
Key Takeaways
Plus size fit improves fastest when you measure your golden numbers once, compare them to a garment’s flat measurements every time, and use inexpensive tailoring or a saved photo profile to close the remaining gap.
Point Details Measure your golden numbers Record bust, natural waist, fullest hips, upper arm, and torso length, then save them. Trust flat measurements over labels Compare a garment’s laid-flat specs to your numbers instead of relying on the size printed inside. Budget for simple tailoring Common fixes like a waistband dart or letting out a seam run about $15 to $30. Match fabric to silhouette Choose stretch knits for comfort and structured wovens with light stretch for shape. Try a photo-based size profile Clothme converts two photos into a saved profile matched against real garment measurements to cut down on returns.
Table of Contents
What Does Plus Size Fit Actually Mean?
In the US apparel industry, “plus size” commonly refers to women’s sizes 14/16 and up, but the term has no legal or universal standard. That inconsistency is exactly why measurement-first shopping exists.
The gap comes down to how brands build their patterns. Some take a straight-size pattern and scale it up proportionally across every size, a shortcut called grading. Others build separate pattern blocks specifically for plus sizes, accounting for the fact that hips, bust, and waist don’t grow at the same rate as height or shoulder width. The first approach is cheaper for a brand to produce. The second one actually fits.
A garment that fits your bust perfectly can still choke your armhole or gap at your waistband. That’s rarely about your body; it’s usually about which pattern-block approach the brand chose before the garment ever reached a factory floor.
LL Bean’s plus-size business charts show just how wide these ranges get: a 1X to 2X chest measurement can span from 43½ inches to 47½ inches, with hips running from 45 to 50½ inches across the same size bracket. Kohl’s FLX size chart goes a step further and lists separate hip ranges for “curvy fit” versus “regular fit” within the same numeric size, which tells you the brand already knows one pattern block won’t serve every body shape labeled 1X.
Before you trust any plus-size retailer’s fit claims, check for three things: a detailed size chart with actual inches (not just S/M/L), multiple model sizes shown wearing the same item, and a choice between curvy and regular fits. A brand that skips all three is asking you to guess.
How Plus-Size Fit Differs From Straight-Size Fit
The core problem is math, not fabric. When a brand grades a pattern up from a straight size, it usually adds the same increment to every measurement point. Real bodies don’t grow that way. Hip circumference often increases faster than shoulder width as you move up in size, and upper arm circumference frequently outpaces bicep-to-shoulder proportions. The result is a shirt that fits your torso but strangles your upper arm, or pants that fit your hips but gap at the waist.
Inclusive-fit guides point to three recurring proportional mismatches: waist gap in bottoms, armhole pull in tops, and torso-length mismatches that leave a shirt riding up or a jacket cutting into your underarms. Fit consultants often use armhole pull as an early warning sign that a brand used simple scaling instead of a dedicated pattern block.
Pro Tip: Before buying, check the shoulder seam placement and armhole depth in product photos. If the seam sits noticeably wide of where your shoulder actually ends, or the armhole looks shallow relative to the bust room, that garment was probably graded up rather than purpose-built.
Universal Standard, a brand built around a size range from 00 to 40, treats fit-first construction as a baseline rather than a bonus, pairing it with free exchanges so a wrong guess doesn’t cost you twice. That combination, purpose-built patterns plus a forgiving return policy, is what separates brands that treat plus sizing as an afterthought from ones that don’t. You can dig deeper into why this happens across the industry in this breakdown of why clothing sizes change from brand to brand.
How Do You Measure Your Golden Numbers?
Five measurements do almost all the work: bust, natural waist, fullest hips or seat, upper arm circumference, and shoulder-to-natural-waist torso length. Add inseam if you’re focused on pants. Take these in fitted underwear or thin clothing, standing naturally with feet together, using a soft measuring tape held snug but not tight.
Bust: Wrap the tape around the fullest part of your chest, keeping it level across your back. Don’t compress the tape.
Natural waist: Bend slightly to one side to find the crease where your torso naturally folds. That’s your natural waist, not your belly button.
Fullest hips or seat: Measure around the widest point of your hips and rear, usually 7 to 9 inches below your natural waist.
Upper arm: Measure around the fullest part of your bicep with your arm relaxed at your side.
Torso length: Measure from the top of your shoulder, at the neck, straight down to your natural waist.
Inseam: Measure from your crotch seam down to your ankle bone along a well-fitting pair of pants.
Once you have real numbers, compare them against a flat garment you already own and love the fit of.
Pro Tip: Lay a shirt or dress you already love flat on a table, measure it edge to edge at the bust and waist, then double the number to get the full circumference. That’s your personal benchmark for how much ease you actually prefer. Apps built for this exact comparison, like the ones covered in this guide to AI body measurement tools for shopping, can save your numbers so you’re not re-measuring every time you shop.
How Do You Match a Garment’s Size Chart to Your Body?
A garment’s flat measurement, taken with the item laid flat and unstretched, tells you far more than the size label sewn into the collar. Flat measurements are the brand’s actual specs. Size labels are just a name the brand chose to put on those specs, and as you’ve seen, that name isn’t consistent from one retailer to the next.
Here’s a worked example. Say your bust measures 46 inches. You find a top listed as size 1X, and the brand’s flat measurement chart shows the 1X laid flat at 24 inches across the chest. Double that flat measurement to get the actual circumference: 48 inches. That gives you 2 inches of ease, room for the fabric to move without pulling. For a woven blouse, 2 inches of ease is comfortable. For a fitted knit with 10% stretch content, that same 2 inches might feel loose, so you’d size down.
Take the flat garment measurement at the point that matters most (bust, waist, or hip, depending on the garment).
Double it if the chart lists a single-layer flat measurement.
Subtract your body measurement from the doubled flat number to find your ease allowance.
Compare that ease number against the fabric content. Woven fabrics need more ease; stretch knits need less.
A few rules make this faster every time you shop:
Always size for your widest relevant point. If your hips are two sizes larger than your bust, buy for the hips and tailor the top.
Give wovens (cotton, denim, structured suiting) more ease room than knits with spandex or elastane blends.
When a size falls between two charted numbers, size up for woven fabric and consider sizing down for heavily stretch fabric.
For dresses specifically, this comparison method gets more useful the more brands you’ve tested. A Chico’s plus size fit breakdown walks through exactly this kind of flat-to-body comparison for one popular retailer, and the same math applies no matter which brand’s chart you’re reading.
What Causes the Most Common Plus-Size Fit Problems?
Four issues account for most plus-size fit complaints, and each one has a specific, usually inexpensive, fix.
Waist gap in jeans and pants happens because many plus-size bodies have a steeper curve between hip and waist than straight-size patterns account for. The fastest fix is a back waistband dart, a small tuck sewn into the waistband at the center back that closes the gap without touching the rest of the garment.
Button gaping across the bust on shirts and blouses usually means the pattern didn’t add enough ease at the widest point of the chest. A tailor can add a small gusset or move the button placket over, though this fix works better on wovens than fitted knits.
Tight armholes signal a grading problem rather than a fabric problem. Letting out the underarm seam by even a quarter inch on each side can restore full range of motion, assuming the seam allowance has room to give.
Wrong torso length shows up as shirts that ride up or dresses that hit at an odd point on the leg. Shortening a hem is cheap and fast; lengthening a torso that’s genuinely too short in construction usually isn’t fixable and means the garment wasn’t built for your proportions.
Problem Typical Fix Estimated Cost/Time Waist gap in jeans Back waistband dart $15 to $30, one visit Button gaping Add gusset or move placket $15 to $30, one visit Tight armholes Let out underarm seam $20 to $30, if seam allowance permits Wrong hem length Shorten hem $15 to $25, quick turnaround
Simple alterations like these run roughly $15 to $30 and can turn an almost right garment into one that fits the way you actually wanted it to. That math changes, though, when the problem is armhole depth with no seam allowance to release, or a bodice that’s structurally too short. At that point, replacement beats repair, because you’re paying tailoring costs to chase a fit the pattern was never built to deliver.
Which Fabrics and Silhouettes Improve Plus-Size Fit?
Stretch fabric solves some fit problems and creates others. Elastane blends move with your body and forgive small measurement mismatches, which is great for a fitted top that needs to skim rather than gap. But too much stretch on a fabric with poor recovery clings in places you’d rather it didn’t, and it exaggerates every proportional issue instead of hiding it.
Certain silhouettes are simply more forgiving by design, regardless of fabric:
A-line skirts and dresses skim past the hip rather than clinging to it, which sidesteps the hip-to-waist ratio problem entirely.
Wrap dresses adjust to your actual waist in real time since you’re tying the fit yourself, not relying on a fixed seam.
Wide-leg trousers balance a fuller hip and thigh without needing a tailored waist-to-hip taper.
Empire waists shift the fitted point above the natural waist, which works well if your torso length runs shorter than a brand’s pattern assumes.
For structured pieces, look for suiting with a small percentage of stretch, usually 2% to 5% elastane, paired with a proper lining. The lining holds the garment’s shape while the small stretch percentage keeps it wearable. For everyday knits, jersey with balanced drape moves with you without turning into a second skin, which is the difference between a top that flatters and one that clings.
Pro Tip: If a product photo shows the fabric stretched taut across a model’s body with visible strain lines, assume it will cling on you too, regardless of your size. That’s a fabric recovery problem, not a fit problem you can size around.
What Should You Check Before Buying Plus-Size Clothing Online?
Run through this checklist before you add anything to your cart, and you’ll cut your return rate dramatically.
Pull your golden numbers if you haven’t already, and keep them saved somewhere you can reference in seconds.
Compare your numbers to the item’s flat measurement chart, not just the size label.
Check the fabric content listed in the description for stretch percentage.
Read reviews specifically from people who mention a body size or measurement close to yours.
Look for multiple model sizes shown wearing the same item, ideally with a “fit notes” section describing how it runs.
Confirm the return and exchange policy before you buy, especially whether returns are free.
When you’re genuinely unsure between two sizes, order both and return the one that doesn’t work, as long as the return policy supports it.
Pro Tip: If you’re photographing yourself to build a size profile, stand against a plain background in fitted clothing, front-facing and one side profile, with your phone at chest height rather than above or below. Consistent lighting and a full-body frame matter more than a fancy setup.
Prioritize retailers that show multiple sizes on different body types over ones that show a single sample size in every product photo. A true-to-size breakdown is useful background here too, since “true to size” claims still require you to check flat measurements rather than take the phrase at face value.
How Does Photo-Based Sizing Improve Plus-Size Fit?
Photo-based sizing tools convert your body shape into a measurement profile without you touching a tape measure every time you shop. The workflow is straightforward: you upload two photos, the system converts your proportions into normalized measurements, and it saves that profile for repeat use. From there, every product you browse gets matched against your saved numbers rather than a generic size chart.
ClothME’s platform builds personalized size profiles this way and saves separate profiles for each family member, so a parent shopping for two kids and themselves isn’t juggling three different sets of paper notes. The system matches those saved profiles against garment measurements across different brands, which addresses the exact inconsistency problem covered earlier in this guide.
Picture buying jeans from a brand you’ve never shopped before. Instead of guessing between a 16 and an 18 based on past experience with a different retailer, a saved photo profile flags that this brand’s curvy-fit 16 already matches your hip-to-waist ratio, sidestepping the waist gap before you ever click “buy.”
The practical benefits stack up quickly: fewer returns because the guesswork is removed before checkout, saved profiles for every family member instead of one person’s notes, and better cross-brand predictions since the system is comparing your actual proportions against garment specs rather than assuming size 16 means the same thing everywhere. If you shop for kids too, the same family-profile approach applies to growing sizes and school-age fit charts.
What Small Habits Actually Improve Plus-Size Fit?
Most people trying to fix their fit problems are fighting the wrong battle. They’re chasing a smaller size number instead of chasing better proportions, and that habit alone causes more bad purchases than any brand’s inconsistent grading ever could.
The biggest mistake is shopping by size label and ignoring flat measurements entirely. A second close contender: skipping the return policy check before buying, then feeling stuck with a wrong purchase because the window already closed. A third: buying the same numeric size across every brand out of habit, even after it’s failed twice.
What actually works is boring, and that’s the point. Keep a running note, digital or paper, of which brands run small, which run generously in the hip, and which curvy-fit lines have actually worked for you. Treat a $20 tailoring visit as a normal line item in your clothing budget rather than a failure of the original purchase. And build the habit of checking flat measurements before checkout, every time, until it takes fifteen seconds instead of feeling like homework.
The single workflow worth adopting this week: measure your golden numbers once, save them somewhere permanent, and run every new brand’s chart against that same set of numbers instead of remeasuring from scratch. Consistency in your own data is what makes brand inconsistency stop mattering. For a broader system built around this exact habit, this guide to finding clothes that fit every time lays out the full process.
Skip the Guesswork With a Saved Size Profile
Clothme turns two uploaded photos into a personalized size profile that follows you across brands, so you’re not starting from zero every time a retailer’s chart looks nothing like the last one.
The two concrete advantages are simple: better cross-brand size predictions because your profile is matched against real garment measurements rather than a size label, and fewer returns because the guessing happens before checkout instead of after the box arrives. Parents managing multiple family members’ sizes get the same benefit multiplied, since each person’s profile stays saved and ready rather than rebuilt from memory every shopping trip. If you want a quick primer on how saved profiles compare across retailers first, shopping smarter with personalized size data walks through the mechanics in more detail.
Create your size profile at Clothme and run your next plus-size purchase against real measurements instead of a guess.
Sources
Solving plus-size fit challenges: a guide to inclusive fashion success
Women’s plus body measurements (LL Bean business size charts)
Always cross-check a brand’s own size chart and model photos against these references before you buy, since even trustworthy general guidance won’t override what a specific retailer’s flat measurements actually say.