Can You Get Accurate Body Measurements From Photos?
Yes, you can get useful body measurements from photos, and for most people the best current method is a calibrated two-photo workflow (front and side, plus your height) rather than a single snapshot. A single photo alone can only estimate proportions; it can’t reliably solve depth, so waist and chest circumferences drift off. Add a second angle and a height reference, and the math has enough information to close that gap.
Here’s what to expect and do right now:
Accuracy range: simple single-photo pose systems typically run ±2 to 3 cm off on linear measurements like arm length or height; calibrated multi-view capture gets tighter, sometimes within a centimeter, under controlled conditions.
Best immediate approach: take a front-facing and a side photo in fitted clothing, enter your height, and let the system triangulate scale.
Depth sensors (LiDAR-equipped phones) beat photo-only methods for absolute precision but need compatible hardware.
Privacy caveat: check whether your images are processed locally or uploaded and stored before you send anything to a service.
Key Takeaways
Reliable body measurement from photos depends on solving depth and scale, which is why two-photo, height-normalized capture consistently outperforms single-image methods.
Point Details Two photos beat one Front plus side photos with a height input resolve scale ambiguity that single images can’t. Expect ±2 to 3 cm on single photos Pose-based single-image systems typically deviate by 2 to 3 centimeters on linear measurements. Calibration needs the same plane A reference object like a credit card must sit at the same depth as the body feature being measured. Ask about data deletion first Confirm whether images are processed locally, retained, or deleted before uploading anywhere. Clothme uses two-photo profiles Clothme builds size profiles from two uploaded photos and a height entry, savable per family member.
Table of Contents
How Does Body Measurement From Photos Actually Work?
Every photo-based measurement method has to solve the same problem: a camera flattens a three-dimensional body into a two-dimensional image, and that flattening throws away depth information. The techniques below differ mainly in how they get that depth back.
Single-image pose and landmark detection. Software identifies skeletal points, shoulders, hips, wrists, ankles, sometimes up to 33 landmarks per frame, then estimates lengths from the distances between them. This works reasonably well for things like inseam or arm span. It struggles badly with circumferences (waist, chest, thigh) because a flat image simply has no way to know how far around the body actually curves.
Multi-view fusion with height normalization. Combine a front photo and a side photo, then anchor the scale using the person’s known height. This resolves the scale ambiguity that cripples single-image methods. Research on partial-view body estimation shows that height normalization measurably improves reconstruction accuracy compared to relying on one viewpoint alone, because it disentangles how far the camera was from how big the subject actually is.
Depth-sensor capture. LiDAR and structured-light sensors, the kind built into some phones and dedicated 3D scanners, measure actual distance to every point on the body, not just its silhouette. This produces the most direct metric data of any consumer-accessible method, without needing a reference object at all.
Statistical fallback models. When photos aren’t available or are too low-quality to trust, some systems estimate measurements from height, weight, age, and general body type using population averages. It’s a rough substitute, useful for a starting estimate, not a substitute for actual capture.
A comprehensive review of 2D image-based body measurement techniques confirms the pattern across the academic literature: scale ambiguity is the central obstacle, and multi-view or depth-assisted approaches are the consistent recommendation for improving metric accuracy.
Which Method Should You Use for Your Situation?
Not every use case needs the same level of precision, and matching the method to the job saves both time and frustration.
Single-photo proportional methods are fast and require nothing but a phone camera. They work fine for rough linear estimates like height-to-shoulder ratio, but they routinely miss the mark on circumferences and anything depth-dependent, since a flat, single-angle image can’t resolve how far a body curves in the third dimension.
Two-photo, multi-view reconstruction hits the sweet spot for most ecommerce sizing and fitness tracking. It asks only a little more of the user (a second photo, a height entry) and repays that effort with meaningfully better circumference and body-shape data.
Depth-sensor or LiDAR capture delivers the highest raw accuracy for lengths and volumes, but only if you own compatible hardware, generally a recent-generation phone or a dedicated scanner. Great for research or clinical use, overkill for casual shopping.
Manual image calibration tools let you drop a known reference object into a photo and measure flat, planar features directly. They shine for engineering-style measurements, laid-flat garments, or product photography, less so for a standing human body with depth variation.
Pro Tip: If you only get one extra photo, make it a side profile. Front-only photos hide depth entirely, and a side view is what actually lets a system estimate chest and waist projection instead of guessing.
How Accurate Is Body Measurement From Photos, Really?
The honest answer depends heavily on which method you’re using and how carefully you shot the photo. Single-image pose detection systems commonly report deviation around ±2 to 3 centimeters on major linear measurements, height, arm length, torso length, under good lighting and a straight-on pose. That’s tight enough for a rough size bucket, not tight enough for tailoring.
Three things drive most of the error:
Scale ambiguity. Without a reference point or a second viewpoint, software can’t tell whether it’s looking at a tall person standing far away or a shorter person standing close. This is the single biggest source of inaccuracy in photo-based measurement, and it’s exactly what multi-view and height-normalization techniques exist to solve.
Perspective and lens distortion. Wide-angle phone lenses bulge the parts of the body nearest the camera. Standing too close exaggerates whatever’s closest to the lens, usually the torso.
Loose or bulky clothing. Baggy fabric hides the actual body contour, which throws off circumference estimates regardless of how good the underlying algorithm is.
A simple validation check costs you five minutes: measure your own waist and chest with a tape measure, then compare against what the software returns. If the gap is bigger than an inch or two on either, something about the capture (angle, distance, clothing) is the likely culprit, not the algorithm itself.
What’s the Best Way to Take Photos for Measurement?
Getting a usable measurement starts before you ever open an app, it starts with how you set up the shot.
Pose correctly. Stand straight, feet shoulder-width apart, arms held slightly away from your sides so they don’t overlap your torso in the frame. Wear fitted clothing, not loose layers, since bulky fabric adds false bulk to every reading.
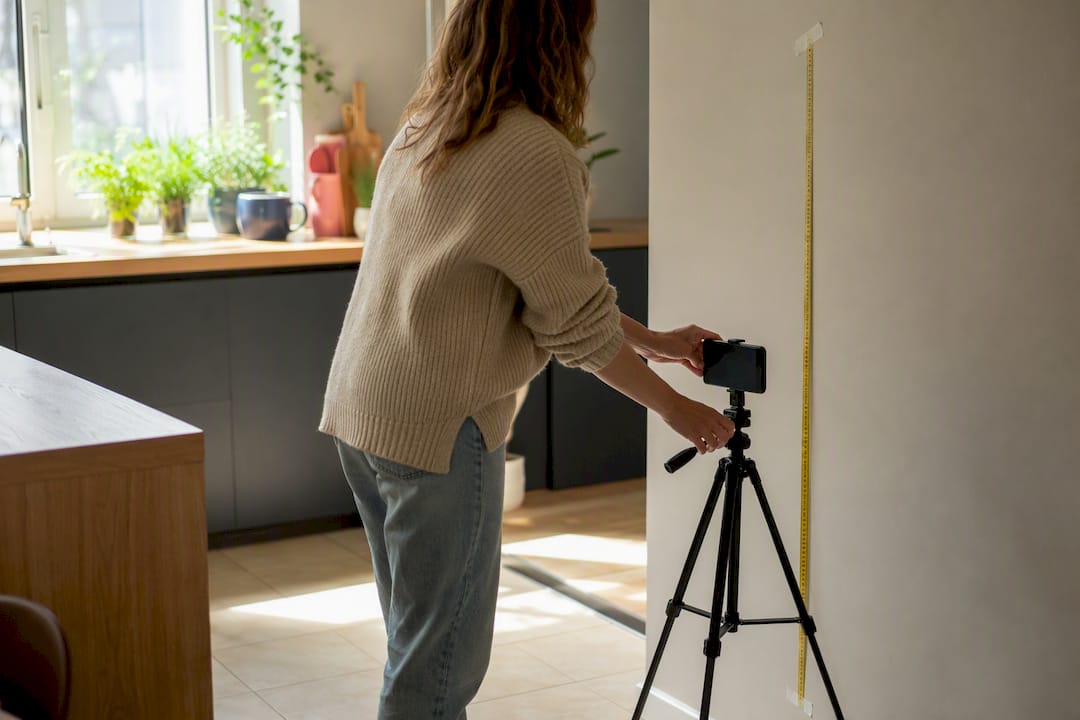
Stabilize the camera. Set your phone on a tripod or a stable surface at roughly hip height. A shaky handheld shot introduces blur and angle error you can’t correct after the fact.
Frame the full body. Back up enough that your entire body fits in the shot without cropping the top of your head or your feet, and keep yourself centered in the frame rather than off to one side.
Use the main camera, not ultra-wide. Wide-angle lenses distort proportions, especially for anything close to the edge of the frame; staying centered and avoiding ultra-wide mode noticeably reduces that distortion.
Light it evenly. Even, diffuse lighting with an uncluttered background helps software (and you) see your actual body outline. Harsh side lighting throws shadows that can hide or exaggerate contours.
Pro Tip: Take the photo against a plain wall, not a patterned one. Busy backgrounds make it harder for edge-detection algorithms to separate your silhouette from what’s behind you, which quietly degrades every measurement downstream. For a full walkthrough with visual examples, Clothme’s guide on taking accurate fit photos covers common framing mistakes step by step.
How Do You Calibrate a Photo for Real Measurements?
A reference object is what turns pixels into inches or centimeters. Drop something of known size into the frame, a credit card is the classic choice at a standard 85.6 millimeters wide, and software can calculate a pixel-to-real-world ratio from it. A tape measure laid flat works too, and longer references generally produce more stable ratios than short ones like a coin.
The catch is the same-plane rule: your reference object has to sit at the same depth as whatever you’re measuring, not closer to or farther from the camera. A card held out in front of your chest calibrates a different plane than your actual waistline, and that mismatch is exactly the kind of error browser-based measurement tools warn users about.
Place the reference flat against the body plane you’re measuring, not floating in front of it.
Use the longest reasonable reference object available; a full tape measure beats a coin.
Keep the camera square-on to that plane, angled shots skew the ratio.
Combine a height input with two photo angles to sidestep the reference-object problem entirely, since height normalization resolves scale ambiguity without needing a physical object in frame.
What Tools and SDKs Handle Photo-Based Measurement?
The tools on the market fall into a handful of clear categories, and knowing which bucket a product sits in tells you a lot about what it can and can’t do. Browser-based pixel-measure apps let you calibrate a single photo with a reference object, useful for one-off measurements but not built for full-body workflows. Pose-landmark APIs detect skeletal points and estimate linear dimensions from a single image. Multi-view 3D reconstruction SDKs take front and side photos plus height and return fuller measurement sets. Depth-sensor platforms tap into phone LiDAR for direct metric capture. Virtual-fitting services layer size prediction on top of any of the above to recommend actual garment sizes.
Developer documentation for photo-estimation APIs typically shows that mature SDKs require front and side photos plus height as standard inputs and return a named list of measurements rather than a vague size guess, that’s a good sign of a serious tool. Clothme’s overview of AI-driven measurement apps for shopping walks through how retailers apply these categories in practice.
Before trusting any tool, run it through this checklist:
What inputs does it need, one photo, two, height, weight?
Does it publish documented accuracy figures, not just marketing claims?
What outputs does it return, raw measurements, a size recommendation, a 3D model?
What’s the privacy policy, and how is your data stored?
What’s the integration effort and pricing model if you’re evaluating it for a business?
Point Details Prefer documented SDKs Choose tools that publish accuracy figures and example outputs over ones that only make marketing claims. Check input requirements Know whether a tool needs one photo, two photos, or height data before you commit to it. Match tool to output need Pick raw measurements for tailoring, a 3D model for research, or a size recommendation for shopping.
What Privacy Questions Should You Ask Before Uploading Photos?
Handing your body photos to any service is a bigger ask than it looks, and a few quick questions separate a trustworthy tool from a risky one.
Are images processed locally on your device, or uploaded to a server?
Are photos retained after processing, and for how long?
Is deletion guaranteed, and can you trigger it yourself?
Does the provider disclose encryption in transit and at rest?
Is there an explicit clause ruling out using your images to train other models?
If any of those answers are vague or missing, treat that as a red flag rather than an oversight. When privacy matters more than convenience, favor tools that process images locally on-device or that state plainly they delete uploads immediately after generating your measurements.
How Do You Choose the Right Measurement Method?
Match the method to what you’re actually trying to accomplish, not to whatever app is easiest to find.
Shopping for clothes online: use a calibrated two-photo method or a virtual-fitting service that returns a size recommendation, not just raw numbers.
Tracking fitness progress over time: use multi-view capture with an export option, so you can re-scan monthly and compare consistent data points rather than one-off snapshots.
Research or clinical work: use depth-sensor capture or a validated 3D scanning method where documented accuracy matters more than convenience.
Whatever you choose, insist on a few non-negotiables: documented accuracy claims, the ability to export your raw measurements (not just a size label), a clear privacy policy, and an easy way to re-scan later. Walk away from any tool that offers none of those, no accuracy claim, no calibration step, and no control over your own data is a combination worth avoiding.
Our Take on the Best Practical Approach
Most people don’t need a lab-grade scanner, they need a method that’s convenient enough to actually use and accurate enough to trust. That’s why a two-photo-plus-height workflow is the right default: it fixes the scale-ambiguity problem that undermines single photos, without requiring hardware most people don’t own. Depth-assisted capture is worth the extra step if you have compatible hardware and need tighter precision. Either way, check your results against a tape measure once. It takes two minutes and it’s the fastest way to know if a tool actually works for your body.
— admin
Get Personalized Size Profiles From Two Photos With Clothme
Clothme turns two photos into a size profile that follows you across every brand you shop, instead of forcing you to redo the guesswork on every new site’s chart. Upload a front and side photo, enter your height, and the platform builds a fit profile matched to your actual proportions, then surfaces products filtered by the styles, colors, and fabrics you actually want.
Parents get an extra edge here: save a profile for each kid, and you never have to re-measure a growing child every time you need new pants. Head to the Clothme landing page to create your first profile and add family members from there. It takes about as long as taking the two photos themselves.
Sources
A Simple Strategy for Body Estimation from Partial-View Images (arXiv)
Inferring Body Measurements from 2D Images: A Comprehensive Review (PMC)