Avoid 2–4 Inch Fit Errors: Measure Chest Size Like a Tailor
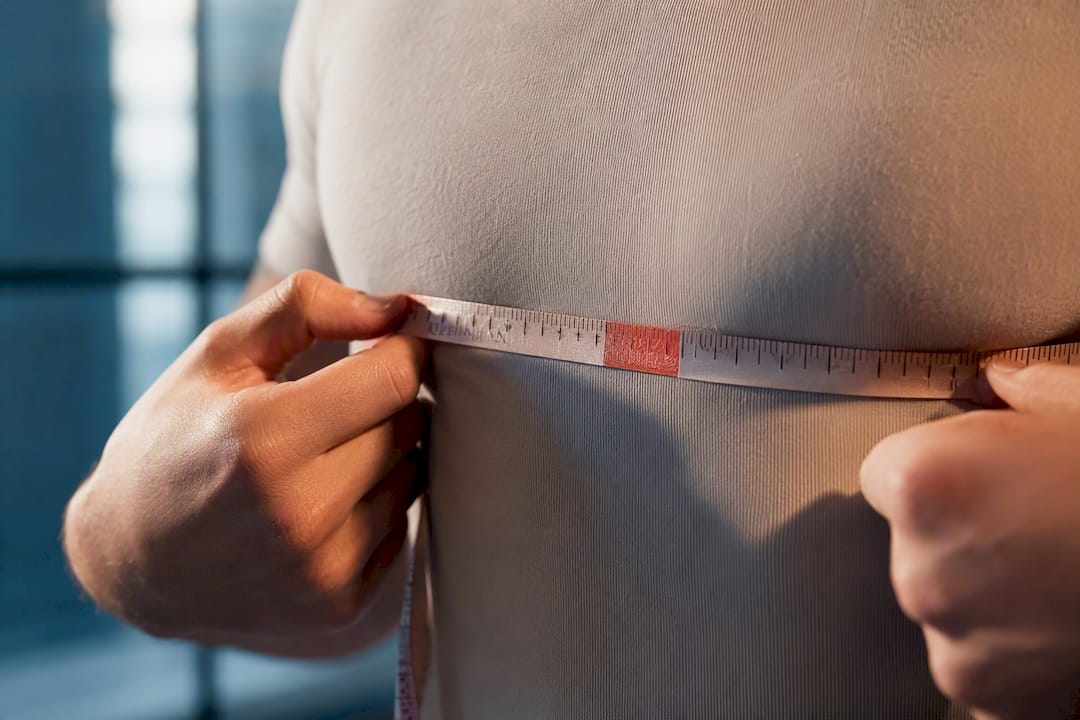
Wrap a flexible, non-stretch tape around the fullest part of your chest, across the nipple line, passing under your armpits and across your shoulder blades. Keep it level and snug enough that one finger slides comfortably between the tape and your skin. Stand naturally, breathe normally, and read the number where the tape overlaps. That’s your actual chest measurement, the one every shirt and jacket size ultimately gets built around.
TL;DR:A proper chest measurement should be taken with a flexible, non-stretch tape, over a thin shirt or bare skin, ensuring the tape stays level.
Measure at the fullest part of the chest, typically across the nipple line, with the tape snug but not tight, and record the reading after normal exhalation.
Buying a jacket requires adding two to four inches of ease to your body measurement, so compare your size to the brand’s specific sizing chart before purchasing.
Common measurement errors include an unlevel tape, measuring over bulky layers, puffing the chest, holding your breath, or relying on a single reading.
Cross-checking shirt sizes by measuring a well-fitting shirt flat and doubling the armpit-to-armpit measurement can help confirm your body measurement accuracy.
Clothme
Find Sizes That Fit Your Family
ClothME uses two photos to create personalized size profiles, helping you shop across brands without repeated measuring or size guesswork.
Explore ClothME
Table of Contents
What You Need Before You Start Measuring
A soft fabric or vinyl tape measure is the right tool here, the same kind tailors keep looped around their neck. It bends around the body without stretching, so it won’t quietly inflate or shrink your number. If you don’t own one, a piece of string works in a pinch: wrap it around your chest, mark where it meets, then lay it flat against a ruler.
A thin, fitted t-shirt is fine. Bulky sweaters, hoodies, or anything with a lot of structure will pad your reading by an inch or more.
Use a fabric or vinyl tape, not a rigid metal one.
Measure over a thin shirt or bare skin, never over a jacket or sweater.
Get a helper if possible; they can check the tape stays level from the side and back.
If you’re measuring alone, hold both ends of the tape at your chest and check the reading in a mirror, or take a quick photo to zoom in on later.
Write down the unit (inches or centimeters) and take two readings before you settle on a number.
Step-by-Step: The Tailor-Approved Way to Measure Your Chest
This is the same basic protocol tailors use for suit and shirt fittings, and it works just as well with a $3 tape measure in your bedroom.
Stand naturally. Shoulders relaxed, arms hanging at your sides, feet about hip width apart. Don’t puff your chest or suck in your stomach.
Find the landmark. Locate the fullest part of your chest, generally across the nipple line for most body types. This is where the tape needs to sit.
Wrap the tape around. Pass it under both armpits and across your shoulder blades in back, meeting back at the front where you started.
Check the level. The tape should run parallel to the floor all the way around, not riding up in back or dipping in front. Have your helper glance from the side to confirm, or check a side-view mirror if you’re solo.
Set the tension. A proper tape reading allows one or two fingers between the tape and your skin, snug but not compressing. Too loose and the number runs big; too tight and you’ll undersize yourself.
Breathe and read. Take a normal breath, exhale normally, and read the measurement right at the end of that exhale. Don’t hold your breath or inflate your chest to look bigger.
Read where the tape overlaps, not at some arbitrary spot on the tape. Take the reading a second time to confirm.
Average your results. If two readings land within half an inch of each other, average them. If they differ by more than that, take a third reading and average the two closest numbers.
If you’re on your own, holding both tape ends together at your sternum while reading a mirror works, but it takes a little practice to keep the tape level while your hands are busy. A phone photo, taken straight on, often gives a cleaner read than trying to squint at a mirror.
Pro Tip: Measure at the same time of day and in the same general state (before a meal, not right after a workout) if you plan to check your measurement again in a few months. Bodies fluctuate more than people expect, and comparing a morning reading to an evening one can throw your numbers off by half an inch or more.
Measuring a Shirt Laid Flat Instead of Your Body
Sometimes it’s easier, or more reliable, to measure a shirt you already own and love the fit of, rather than your own body. This works especially well when you’re trying to match a brand’s actual cut rather than a generic size label.
Pick a shirt whose fit you actually want to replicate, whether that’s slim, regular, or relaxed.
Lay it flat on a bed or table, front side up, and smooth out any wrinkles.
Measure straight across from armpit seam to armpit seam.
Double that number. This armpit-to-armpit measurement doubled gives you the garment’s full chest circumference, which you can then compare to your body measurement or a size chart.
Keep in mind that a well-worn cotton shirt may have stretched slightly, and some knits shrink after washing, so this method is a useful cross-check rather than a perfect substitute for a body measurement. Also worth knowing: some brands list “half chest” (the armpit-to-armpit number) on their size charts instead of full chest, so always check which one you’re looking at before you compare it to your own measurement.
Turning Your Chest Measurement Into a Real Size
Your body’s chest measurement and your jacket size are not the same number, and mixing them up is one of the most common fitting mistakes people make when shopping online. Jacket sizes typically build in 2 to 4 inches of “ease” over your actual chest measurement, depending on whether the cut is slim or roomier. A 40-inch chest might land you in a jacket size a bit larger for a closer cut, or an additional size up for layering a sweater underneath.
Quick reference: chest measurement to typical shirt size
Chest (inches) Common size — S 38 to 40 M 42 L — XL — XXL
Retail size charts, including ASOS’s, map chest ranges to labels roughly this way, but brand variability is real. A “medium” at one label can run closer to a “small” at another. Always check the specific brand’s own size chart before ordering, and if you own one shirt that fits exactly right, measure it and use that as your control against new purchases.
If your number falls between two sizes, size up for a roomier fit or if you plan to layer; size down, or flag it for tailoring, if you want something closer to the body.
Common Mistakes That Throw Off Your Number
Most bad chest measurements come down to the same handful of errors, all fixable in seconds once you know what to look for.
Tape isn’t level. A tape that rides up in back reads smaller than reality. Check from the side or have someone sight it for you.
Measuring over thick layers. A hoodie or heavy sweater can add an inch or more to your reading.
Puffing the chest. Standing at attention with your chest out inflates the number artificially. Stand naturally instead.
Holding your breath. Standardizing posture and breathing phase matters because small changes in these factors can shift readings by more than a centimeter. Measure at a normal exhale, every time.
Trusting a single reading. If two attempts disagree, measure again and average.
Pro Tip: Keep a short note next to your measurement: what shirt you wore, whether you had a helper, and the time of day. That context turns a random number into something you can actually trust and compare later.
How ClothME Fits Into Your Measuring Routine
A tape measure gives you one accurate number today. Cross-brand shopping is where things get messy, because a 40 inch chest fits differently at every label. ClothME builds a personalized size profile from two uploaded photos, matching you to garments across brands without you re-measuring every time you shop. Profiles can be saved for other family members too, which is helpful when buying shirts for multiple people.
None of that replaces a proper chest measurement. Keep your verified number on hand for tailoring, formalwear, or any purchase where precision actually matters. Think of ClothME as the layer that handles everyday cross-brand guesswork once you’ve already done the careful measuring.
A Quick Note on Why This Actually Matters
A precise chest measurement is the difference between ordering once and ordering three times while you wait for exchanges to process. I’ve watched people guess their size based on what they “usually wear” and get burned by a brand that cuts narrow. Write down your conditions, measure twice, and save the number somewhere you’ll actually find it again.
— admin
Try ClothME to Stop Re-measuring Every Time You Shop a New Brand
You’ve done the hard part: an accurate, tailor-approved chest measurement. ClothME takes that a step further by building a size profile from two photos, then matching you to products across different brands so you’re not guessing whether a “medium” at one store fits like your usual size. Save profiles for family members too, so buying for the household is easier without starting from scratch every time someone needs new clothes.
ClothME won’t replace the tape measure sitting in your drawer, and it shouldn’t. Keep your verified chest number for tailoring and special purchases. For everyday cross-brand shopping, though, a saved profile means less second-guessing and fewer returns. Create your size profile on ClothME and see how your next order fits before it ships.
Sources
How to Measure Chest: Complete Guide for Suit & Shirt Fit — Nathan Tailors
Chest circumference measurement: a pro protocol — Cartwright Fitness
FAQ
What Is a 42 Chest Size?
A 42-inch chest means your body measures 42 inches around the fullest part of your torso, across the nipple line. In shirts, that typically lands around a large; in jackets, a 42R usually adds a couple inches of ease over that measurement.
How Do I Measure My Chest Size at Home?
Wrap a flexible tape around the fullest part of your chest, under your armpits and across your shoulder blades, keeping it level and snug enough for one finger to fit underneath. Stand relaxed, breathe normally, and read the number where the tape overlaps, then measure twice and average the results.
What Is a 38 Inch Chest?
A 38 inch chest typically falls into a small or small to medium range for shirts, depending on the brand’s own size chart. For jackets, expect a 38R to include roughly 2 to 4 inches of ease beyond that raw measurement.
What Should I Do if My Chest Measurement Falls Between Two Sizes?
Size up if you plan to layer or want a roomier fit, and size down or flag it for tailoring if you prefer something closer to the body. When in doubt, compare your number against a favorite shirt you already own using the flat-lay method.
Can I Trust a Shirt’s Listed Measurements Instead of Measuring My Body?
Laying a well-fitting shirt flat and measuring armpit to armpit, then doubling it, is a solid cross-check, especially for repeat purchases from a brand you know. Just remember that worn or washed fabric can stretch or shrink slightly, so it works best alongside, not instead of, a direct body measurement.