How to Find Your Bra Size at Home in Under 5 Minutes
Measure snugly under your bust for the band, then around the fullest part of your chest for the bust. Subtract band from bust; the difference in inches gives you the cup letter, and you round the band to the nearest even number. A band measurement with a bust difference landing around the DD/E range is a typical starting point; if the band feels loose, trying a sister size with a larger band and one cup size down may help. Good Housekeeping, Calculator, and Clothme all use versions of this same math.
Band = snug measurement directly under the bust, rounded to the nearest even number
Bust = measurement around the fullest part, tape level and relaxed
Cup = bust minus band, mapped to a letter (1" = A, 2" = B, and so on)
Key Takeaways
Accurate bra sizing at home comes down to a snug underbust measurement, a relaxed bust measurement, and simple subtraction to find your cup letter.
Point Details Band comes first Measure snugly under the bust and round odd numbers up to the nearest even size. Cup is subtraction Bust minus band in inches maps directly to a cup letter, from A at 1 inch upward. Sister sizes fix fit gaps If a 32DD feels loose in the band, try 34D for the same cup volume with more room. Fit checks confirm the math Watch for band riding up, gaping cups, or digging straps as signs to adjust or re-measure. Clothme extends the process A photo-based profile at Clothme saves your size for faster shopping once your measurements are set.
Table of Contents
How Do You Measure Bra Size at Home Correctly?
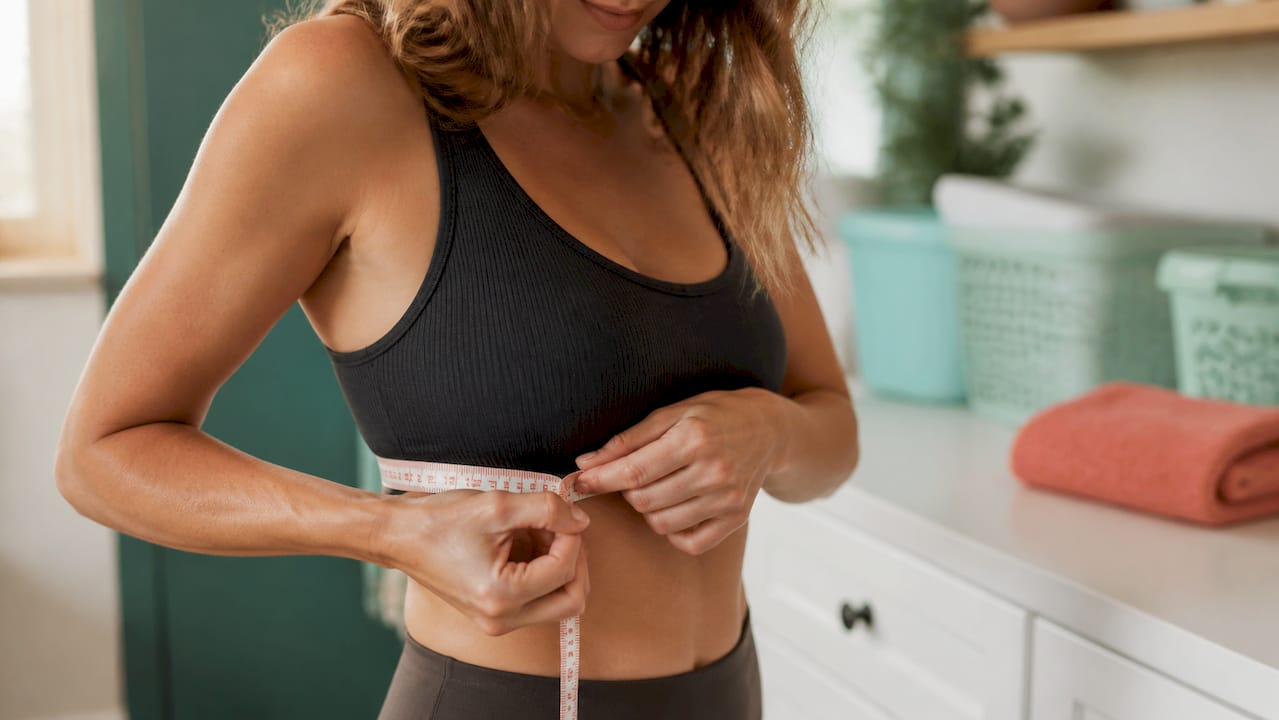
Getting an accurate bra measurement at home comes down to three things: the right tool, the right posture, and taking the measurement twice. You don’t need a fitting room or a professional for this part. You need a soft measuring tape (the kind used for sewing, not a metal one), a mirror, and ideally a non-padded bra or no bra at all. A second person helps keep the tape level, but plenty of people do this alone with a mirror.
Measuring your band:
Wrap the tape snugly around your ribcage, directly under your bust, keeping it level all the way around your back.
Check the tension with the two-finger test: you should be able to slide two fingers under the tape, but no more.
Read the number where the tape meets, and round odd numbers up to the next even number since bands are sold in even sizes like 30, 32, and 34.
Measuring your bust:
Wrap the tape around the fullest part of your chest, usually right across the nipple line.
Keep the tape parallel to the floor, not angled up or down in the back.
Exhale normally and read the number. Vogue’s fitting guide recommends measuring on a relaxed exhale and using an unpadded bra, since padding and heavy underwire distort the reading.
Pro Tip: If you’re measuring solo, stand in front of a mirror and lean slightly forward from the waist for the bust measurement. This lets breast tissue settle naturally into the tape, which is closer to how it sits inside an actual bra cup.
Common mistakes: pulling the tape too tight for the band, measuring bust while inhaling, or letting the tape sag in the back. Any of these can throw your final size off by a full cup or more.
How Do You Calculate Cup Size From Your Measurements?
Once you have both numbers, the math is simple subtraction: bust minus band equals the difference in inches, and that difference maps to a cup letter. A 1-inch difference is an A cup, 2 inches is a B, 3 inches is a C, 4 is a D, and 5 inches lands around DD or E depending on the brand’s labeling. Glamour’s measuring guide uses this same inch-to-cup system, and it’s the industry standard most calculators run on.
Using our earlier example: a 32-inch band and a 37-inch bust give you a 5-inch difference, or 32DD.
Difference Cup Letter 1 inch A 2 inches B 3 inches C 4 inches D 5 inches DD/E
You may have heard the old “add 4 inches” rule for calculating band size, a leftover from decades ago when most bras had less stretchy elastic and needed extra room built in. Modern elastic is stronger, so most current measuring guides skip that step entirely and just round your actual underbust number to the nearest even measurement.
Pro Tip: If a 32DD doesn’t feel right, try its sister size, 34D. Both hold roughly the same cup volume, just distributed across a looser band and a slightly larger cup. Sister sizing is the fastest fix when the math says one thing but the mirror says another.
Quick Bra Size Conversion Chart for US Sizing
Once you know your inch difference, this chart translates it directly into a starting cup size without any extra math.
Labeling gets messy above a D cup because brands don’t agree on names. Some call a 5-inch difference “DD,” others call it “E,” and a 6-inch difference might be “F” in one brand and “DDD” in another. This is exactly why sizes shift so much between brands, and why your measured size is a starting point, not a locked-in answer. If you’re shopping internationally, convert inches to centimeters before checking a European or UK size chart, since most non-US brands size by centimeters rather than inches.
What Are the Signs of a Bad Bra Fit?
Numbers on a tape only tell part of the story. The real test happens once you put a bra on and move around in it for a few minutes.
Run through this checklist:
The band sits level all the way around, not riding up in the back.
The center gore (the fabric between the cups) lies flat against your sternum.
Cups fully contain your breast tissue with no gaping or spillage.
Straps stay in place without digging in or slipping down.
The underwire sits on your ribcage, not on breast tissue itself.
If something’s off, here’s how to fix it:
Band rides up in back → go down a band size and up a cup size (sister sizing).
Cups gap at the top → go down one cup size, keep the same band.
Underwire pokes at the sides → try a different cup shape or a wider-set style.
Straps dig into shoulders → the band isn’t doing its job; go down a band size.
Pro Tip: Breast asymmetry is normal. Most people have one side slightly larger than the other, so fit the bra to your larger side and use a strap pad or removable insert on the smaller one.
Re-measure every 6 to 12 months, or sooner after pregnancy, significant weight change, or surgery. Different styles fit differently, too: a wireless bra relies more on band compression than an underwire t-shirt bra, and balconette styles sit lower on the bust, so don’t be surprised if your “size” shifts slightly from style to style.
Which Calculators and Tools Make This Easier?
If you’d rather skip manual math, a few tools do the conversion for you. A Bra That Fits offers a free calculator paired with visual diagrams showing exactly where to place the tape. Calculator.net’s bra size calculator does the subtraction and cup mapping automatically, and it notes that measuring to the nearest quarter inch produces more reliable results than rounding to the nearest whole inch.
No soft tape on hand? A non-stretch string, ribbon, or even a phone charging cable works as a substitute. Wrap it around your body the same way you would a tape, mark where the ends meet with your finger, then lay it flat against a ruler to get your number. It’s not elegant, but it’s accurate enough to plug into any bust and waist measurement guide or online calculator.
Can a Photo-Based Sizing Tool Replace Manual Measuring?
Photo-sizing tools estimate your measurements from two uploaded photos and save that profile for future shopping. They’re genuinely useful for everyday online shopping and for storing sizes for family members so you’re not re-measuring kids every season. Stick with tape measurements, though, after major body changes like pregnancy or surgery, where photo estimates lag behind reality.
Use even, natural lighting and a plain background for photos.
Wear fitted, neutral clothing so the tool can read your shape accurately.
Pro Tip: Keep photos private and only upload them to platforms with clear data policies you’ve actually read.
Measuring Gives You a Starting Point, Not a Guarantee
I’ve found the tape measure gets you close, but breast shape, tissue density, and brand cut all shift the final fit, so trying a sister size or two is normal, not a failure.
Build a Sizing Profile That Remembers Every Measurement
Manual measuring gets you a solid starting size, but you still have to redo it every time you shop a new brand or buy for someone else in the family. Clothme skips that repeat work: upload one photo, generate a size profile, and save it for yourself or your kids so future shopping trips start with sizes that already match your body.
This isn’t a replacement for tape and math when you’ve had a major body change, a pregnancy, or surgery. It’s a shortcut for everyday shopping once you already know your baseline. Head to Clothme and build your first size profile in the time it takes to snap a photo.
Sources
For deeper reading, Good Housekeeping’s fitting guide covers technique and fit signs in detail, while Vogue’s measuring guide focuses on posture and breathing. For instant math, A Bra That Fits and Calculator.net both turn your raw numbers into a starting size in seconds.
Experts explain how to measure your bra size correctly at home | Good Housekeeping
How To Actually Measure Your Bra Size For a Perfect Fit | Vogue